Hi everyone,
I have a piece in the Quilt National exhibit that will be at the Oceanside Museum in San Diego from October 14-February 20. Thye have sent me 2 passes (each good for 2 people) to attend the preview recepetion on October 13 from 5-7 . I will not be able to go but wondered if any of you on the west coast would care to use them? Or if you happen to be in San Diego on the fateful day!
Let me know and I can send them on. It is always a nice exhibit and I am sure the reception will be great.
Barbara

Saturday, August 25, 2012
Thursday, August 23, 2012
KathyAnne Art Featured artist profile
Kathy Anne White has written an article about me on her blog. Please follow the link to read more and see what I worked on in her digital printing alternatives workshop at Hudson Valley this past July.
Wednesday, August 22, 2012
An article about my new CD
Add Depth to Fabric Art with Double Thread Stitching
Monday, August 20,
2012, 11:21:00 PM | Vivika_Blog
Being on set when we taped the most recent Quilting
Arts WorkshopTM videos was a real education. Not only did I
learn how the videos are taped, but I also picked up lots of tips for quilting
and fabric
art.
One of
my favorite ideas for enhancing depth and texture comes from Barbara Schneider,
who makes gallery-worthy fiber art leaf sculptures. She often uses two threads
in her needle at once.
"Using a double thread gives you more definition and 'oomph' in the line. It makes a nice contrast to a single thread used for more stitching in the background," says Barbara.
"Mixing threads breaks up the regularity of the pattern. Most variegated threads have a repetition to the timing that becomes obvious. When I use a solid and a variegated together it breaks up that pattern and gives you a more natural look."
I asked Barbara to elaborate on her tips for using two threads at once, and she happily agreed.
On her Quilting Arts WorkshopTM, "Three-Dimensional Fiber Art: Shape & Texture, Light & Shadow," Barbara offers many tips and techniques for enhancing your fabric art's depth and texture. You can now download "Three-Dimensional Fiber Art" and start using her techniques right away.

P.S. Have you double-threaded your machine needle? Is so, how did that work out? Any advice for the rest of us? Leave your comment below.

 |
| Dimensional fiber art by Barbara
Schneider, Oak Leaf series. |
"Using a double thread gives you more definition and 'oomph' in the line. It makes a nice contrast to a single thread used for more stitching in the background," says Barbara.
"Mixing threads breaks up the regularity of the pattern. Most variegated threads have a repetition to the timing that becomes obvious. When I use a solid and a variegated together it breaks up that pattern and gives you a more natural look."
I asked Barbara to elaborate on her tips for using two threads at once, and she happily agreed.
- I use related colors in solids, solid and variegated together, similar but different colors together, similar but different variegated together. It all depends on what look I am trying to get. Sometimes I put the solids as a first layer of stitching and then go back over the same area (not the same lines of stitching) with the variegated (look at the large leaves to see samples of this). The whole purpose is to achieve texture and a more natural look to the stitching.
-
I mostly use the rayon threads as they seem to go through the machine the best. Usually, I try to keep the threads the same weight and type, otherwise one or the other might break more often.
-
I have two thread holders on my machine, so I thread them both and then pull both threads through the tensioning process together and thread them together. I have an automatic threader on my Janome 6500. If you don't have that, then use a small hand threader (like they sell for threading a sewing needle) and use that to put the thread through.
-
I use a large topstitching needle (I like the one from Superior threads the best). It has more room, and the thread seems not to break as often as with other needles.
-
I do not play with tension at all. Just leave well enough alone.
On her Quilting Arts WorkshopTM, "Three-Dimensional Fiber Art: Shape & Texture, Light & Shadow," Barbara offers many tips and techniques for enhancing your fabric art's depth and texture. You can now download "Three-Dimensional Fiber Art" and start using her techniques right away.

P.S. Have you double-threaded your machine needle? Is so, how did that work out? Any advice for the rest of us? Leave your comment below.
Wednesday, August 1, 2012
Sugar Syrup Resist

Do you love working with resists as much as I do? Don't miss my sugar syrup tutorial on today's And Then We Set It On Fire blog.
Visit the Fire blog to download the tutorial and enter a drawing to win a resist-dyed sample set.
Tuesday, July 31, 2012
Adding Dimension to Your Cloth
Many artists working on a flat surface continually strive to create
the illusion of depth and texture. There are many printing and dyeing
techniques that accomplish that goal. However sometimes the work calls
for an element that is raised above the surface of the cloth. Do you
want to create real texture, not just the illusion? Over the next few weeks I'll highlight some of the techniques I use to add dimension.
Hand stitching in a contrasting or complimentary color adds a nice accent. If you don't consider yourself good with a needle - no problem. I did not come from a stitching background. When I first started using stitch seven years ago, it felt very awkward. But I have come to love it. I find it calming to sit with a needle and thread. You don't need to know any fancy stitches - a simple stitch repeated many times can result in a rich surface.
Use a thicker thread (4-6 strands of embroidery floss or size #3 or 5 of pearl cotton) for more impact. Embroidery floss is made up of six strands that can be separated to create the desired thickness. While that sounds great because you have the flexibility to create the thickness you want, beginners may find it harder to stitch with the floss. Sometimes the plies separate while stitching, leaving a loose thread in some stitches. Pearl cotton has multiple plies, but they are non-divisible. It comes in several thicknesses - the smaller the number the thicker the thread.
See how a simple straight stitch in red thread draws the eye into the small circle?
The stitching on Marking Time is more subtle. A tone-on-tone effect was used to keep the emphasis on the red painted marks.
The decision about what stitch to use was easy. These two pieces explore our emphasis on "marking time" - looking to the past or future rather than focusing on the current moment. The universal symbol for counting seemed to make sense as a stitched element. As did a double chain stitch to complete the larger circles on This Moment.
Hand stitching in a contrasting or complimentary color adds a nice accent. If you don't consider yourself good with a needle - no problem. I did not come from a stitching background. When I first started using stitch seven years ago, it felt very awkward. But I have come to love it. I find it calming to sit with a needle and thread. You don't need to know any fancy stitches - a simple stitch repeated many times can result in a rich surface.
Use a thicker thread (4-6 strands of embroidery floss or size #3 or 5 of pearl cotton) for more impact. Embroidery floss is made up of six strands that can be separated to create the desired thickness. While that sounds great because you have the flexibility to create the thickness you want, beginners may find it harder to stitch with the floss. Sometimes the plies separate while stitching, leaving a loose thread in some stitches. Pearl cotton has multiple plies, but they are non-divisible. It comes in several thicknesses - the smaller the number the thicker the thread.
 |
| This Moment, detail view |
 |
| This Moment, detail view |
 |
| This Moment, 80" x 24", Silk noil |
See how a simple straight stitch in red thread draws the eye into the small circle?
 |
| Marking Time, detail view |
 |
| Marking Time, 80" x 24", Silk noil |
The stitching on Marking Time is more subtle. A tone-on-tone effect was used to keep the emphasis on the red painted marks.
The decision about what stitch to use was easy. These two pieces explore our emphasis on "marking time" - looking to the past or future rather than focusing on the current moment. The universal symbol for counting seemed to make sense as a stitched element. As did a double chain stitch to complete the larger circles on This Moment.
Tuesday, July 24, 2012
Three Dimensional Fiber Art DVD released
Yeterday my new DVD, Three Dimensional Fiber Art: Shape and Texture, Light and Shadow was released. It is very exciitng to be an "author", especially after all the years I spent in educational publishing!
Here are links to the various versions of the DVD.
*Digital download available now! It’s available in both HD ($16.95) and standard ($14.95):
HD download link: http://www.interweavestore.com/Quilting/DVDs-Videos/Three-Dimensional-Fiber-Art-Download-in-HD.html
Standard video download link: http://www.interweavestore.com/Quilting/DVDs-Videos/Three-Dimensional-Fiber-Art-Download.html
*DVD available: 8/21/12 - $19.95. It’s available now as a pre-order:
http://www.interweavestore.com/Quilting/DVDs-Videos/Three-Dimensional-Fiber-Art-DVD.html
Interweave has been a great company ot work with on this. The experience was enjoyable and I learned a lot in the process.

Tuesday, July 10, 2012
Ice Dyeing

I'm a little late on the ice dyeing craze, but I finally made time to try it. I read about snow dyeing several years ago and thought it sounded interesting, although not very practical for someone who lives in a warm climate. Ice dyeing makes more sense, and summer is actually a good time, because the mess can stay outside.
After doing an internet search, I realize there are many variations. I chose to work with the dyes in their powdered state rather than mixing them into a liquid. I placed a tarp on the ground outside and used a plastic grid from a commercial light fixture to raise the fabric out of the melting ice/dye.
I am pleased with the results, although I have to admit that while it was in process I was not impressed. I had read some comments that the results are similar to what you get with low water immersion dyeing. I found a significant difference. The patterning is hard to describe, but it has a distinctive look. Here are my results (I used Dharma Bronze and ProChem Tobacco on all these pieces):
This is a piece of silk dobby noil (from Thai Silks). It is a wonderful fabric and it took the ice dyeing beautifully.

This is a heavy-weight cotton.

This is silk habotai, and it was underneath the two previous fabrics to catch the dye as it dripped down. This looks like a typical low water immersion dye.

This is also cotton, and it was dry when I placed the ice cubes on top. The other fabrics were all wet.

This piece was underneath the plastic grid to catch the drips from the previous cloth.

Have you tried ice and snow dyeing? What was your experience?
Thursday, June 28, 2012
Studio space
Here are some photos of my soon to be organized new studio space, I can't even figure out how I had all this stuff crammed into my 2 rooms at home. I feel like it was the clown car where people keep getting out of it! I am looking forward to getting a workshop line-up going in the fall because I can now have 10 or so students at a time. And it ahs been fun to be in a space with other artists again. Lots of ideas are generating!


Friday, June 1, 2012
EVER TRIED VAT DYE DISCHARGE?!
I've been incorporating vat dye discharge into much of my fiber work. It is a serendipitous way to create new markings and color with rich warm hues on previously dyed fabric by using bound resist techniques such as Shibori. In addition, an amazing and magical phenomenon happens around the resisted area called "halo effect".
Besides vat dyes, 2 chemicals: sodium hydroxide (lye) and thiourea dioxide or sodium hydrosulfite must be added to the dye bath to accomplish the discharge and color replacement. After dyeing, the fabric must be exposed to the air to oxidize. It's all worth it since the results can be breath-taking and fill your soul! Imagine removing color and adding entirely new color in selected areas simultaneously!!!
This Spring I put together a new collection of scarves with shibori using vat dye discharge in "to-dye-for" colors in luscious jade, apple, turquoise, orange and shocking pink. I used rubber bands, folded and clamped wooden blocks and braiding for resist. Some examples of my creative process follow. The first 2 images portray the "braided" method on silk charmeuse.
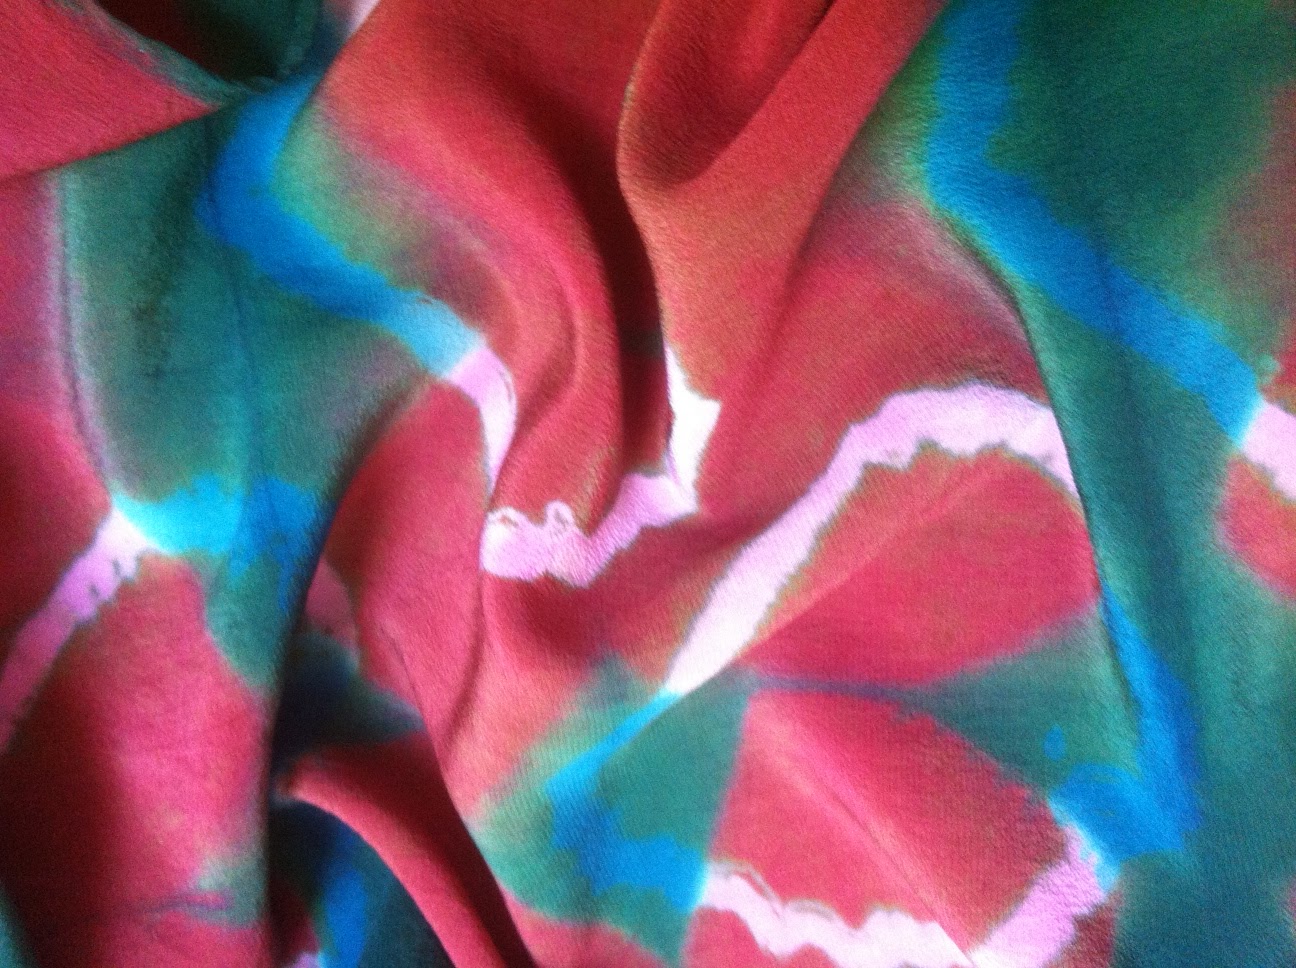
 This scarf was first ground dyed with shades of raspberry and bronze and then vat dye discharged with turquoise - eye candy!
This multi-colored "cold-water" immersion dyed silk scarf was vat dye discharged with jade.
What lovely patterns, color and texture can be achieved using these methods!
Next, I vat dye discharged with apple green using the "fold and clamp wooden block method following a multi-colored dye process with cold water immersion dye!

This charmeuse scarf was first dyed pale pink, band resisted and vat dye discharged in shocking pink and lastly fold-clamp method with jade. Notice the "halo effect" around the light pink circles - it's amazing!

This last example was dyed pale blue on silk crepe, banded and vat dye discharged with apple green, then "braided" and vat dye discharged in orange...
I buy vat dye products from both Pro Chemical and Dye in Somerset, MA (1-800-2-BUY-DYE)(www.prochemical.com ) and Aljo Mfg. Co. in New York, NY ( 212 966 4046).
Are you ready to try Vat Dye Discharge??? Just imagine the limitless possibilities!!!
Any questions, you can contact me - Mary-Ellen Latino (melsrun2000@gmail.com) or the manufacturers...
Reach for the moon and catch many amazing stars along the journey!
Besides vat dyes, 2 chemicals: sodium hydroxide (lye) and thiourea dioxide or sodium hydrosulfite must be added to the dye bath to accomplish the discharge and color replacement. After dyeing, the fabric must be exposed to the air to oxidize. It's all worth it since the results can be breath-taking and fill your soul! Imagine removing color and adding entirely new color in selected areas simultaneously!!!
This Spring I put together a new collection of scarves with shibori using vat dye discharge in "to-dye-for" colors in luscious jade, apple, turquoise, orange and shocking pink. I used rubber bands, folded and clamped wooden blocks and braiding for resist. Some examples of my creative process follow. The first 2 images portray the "braided" method on silk charmeuse.

 |
What lovely patterns, color and texture can be achieved using these methods!
 |

This last example was dyed pale blue on silk crepe, banded and vat dye discharged with apple green, then "braided" and vat dye discharged in orange...
I buy vat dye products from both Pro Chemical and Dye in Somerset, MA (1-800-2-BUY-DYE)(www.prochemical.com ) and Aljo Mfg. Co. in New York, NY ( 212 966 4046).
Are you ready to try Vat Dye Discharge??? Just imagine the limitless possibilities!!!
Any questions, you can contact me - Mary-Ellen Latino (melsrun2000@gmail.com) or the manufacturers...
Reach for the moon and catch many amazing stars along the journey!
Wednesday, May 23, 2012
CAN YOU FEEL THE RHYTHM?

I am interested in translating movement to cloth. I take my inspiration from music and dance. This is a very broad subject so I needed to narrow my focus. My brush idea sprang to life while watching a Dale Chihuly video. He stands over his large paper and uses household brooms to apply his paint. What a wonderful way to apply movement and physical action to my artwork. I began using various brush marks that I make while listening to different types of music. I use commercial, found and hand crafted brushes. A few of them are shown above.

Here, you can see an example of these marks. In this piece, Continuum I, I was listening to the Bach Suites for cello. I placed the brush marks directly on the hand dyed fabric using black textile ink and a small wisk broom.

Another one of my favorite tools is soy wax, brushed on a 24" x 30" silk screen and also directly on the fabric.

The results after multiple layers of dye printing.

In my most recent work, I am exploring layering. One set of brush marks, made on one piece of fabric, inspired by one piece of music, and another set of brush marks, inspired by a different piece of music printed on a sheer fabric. This gives me the ability to combine multiple layers of brush marks and music. Like the notes on a music score, the possible combinations are endless. What is your creative rhythm and how do you get there?
Subscribe to:
Posts (Atom)