

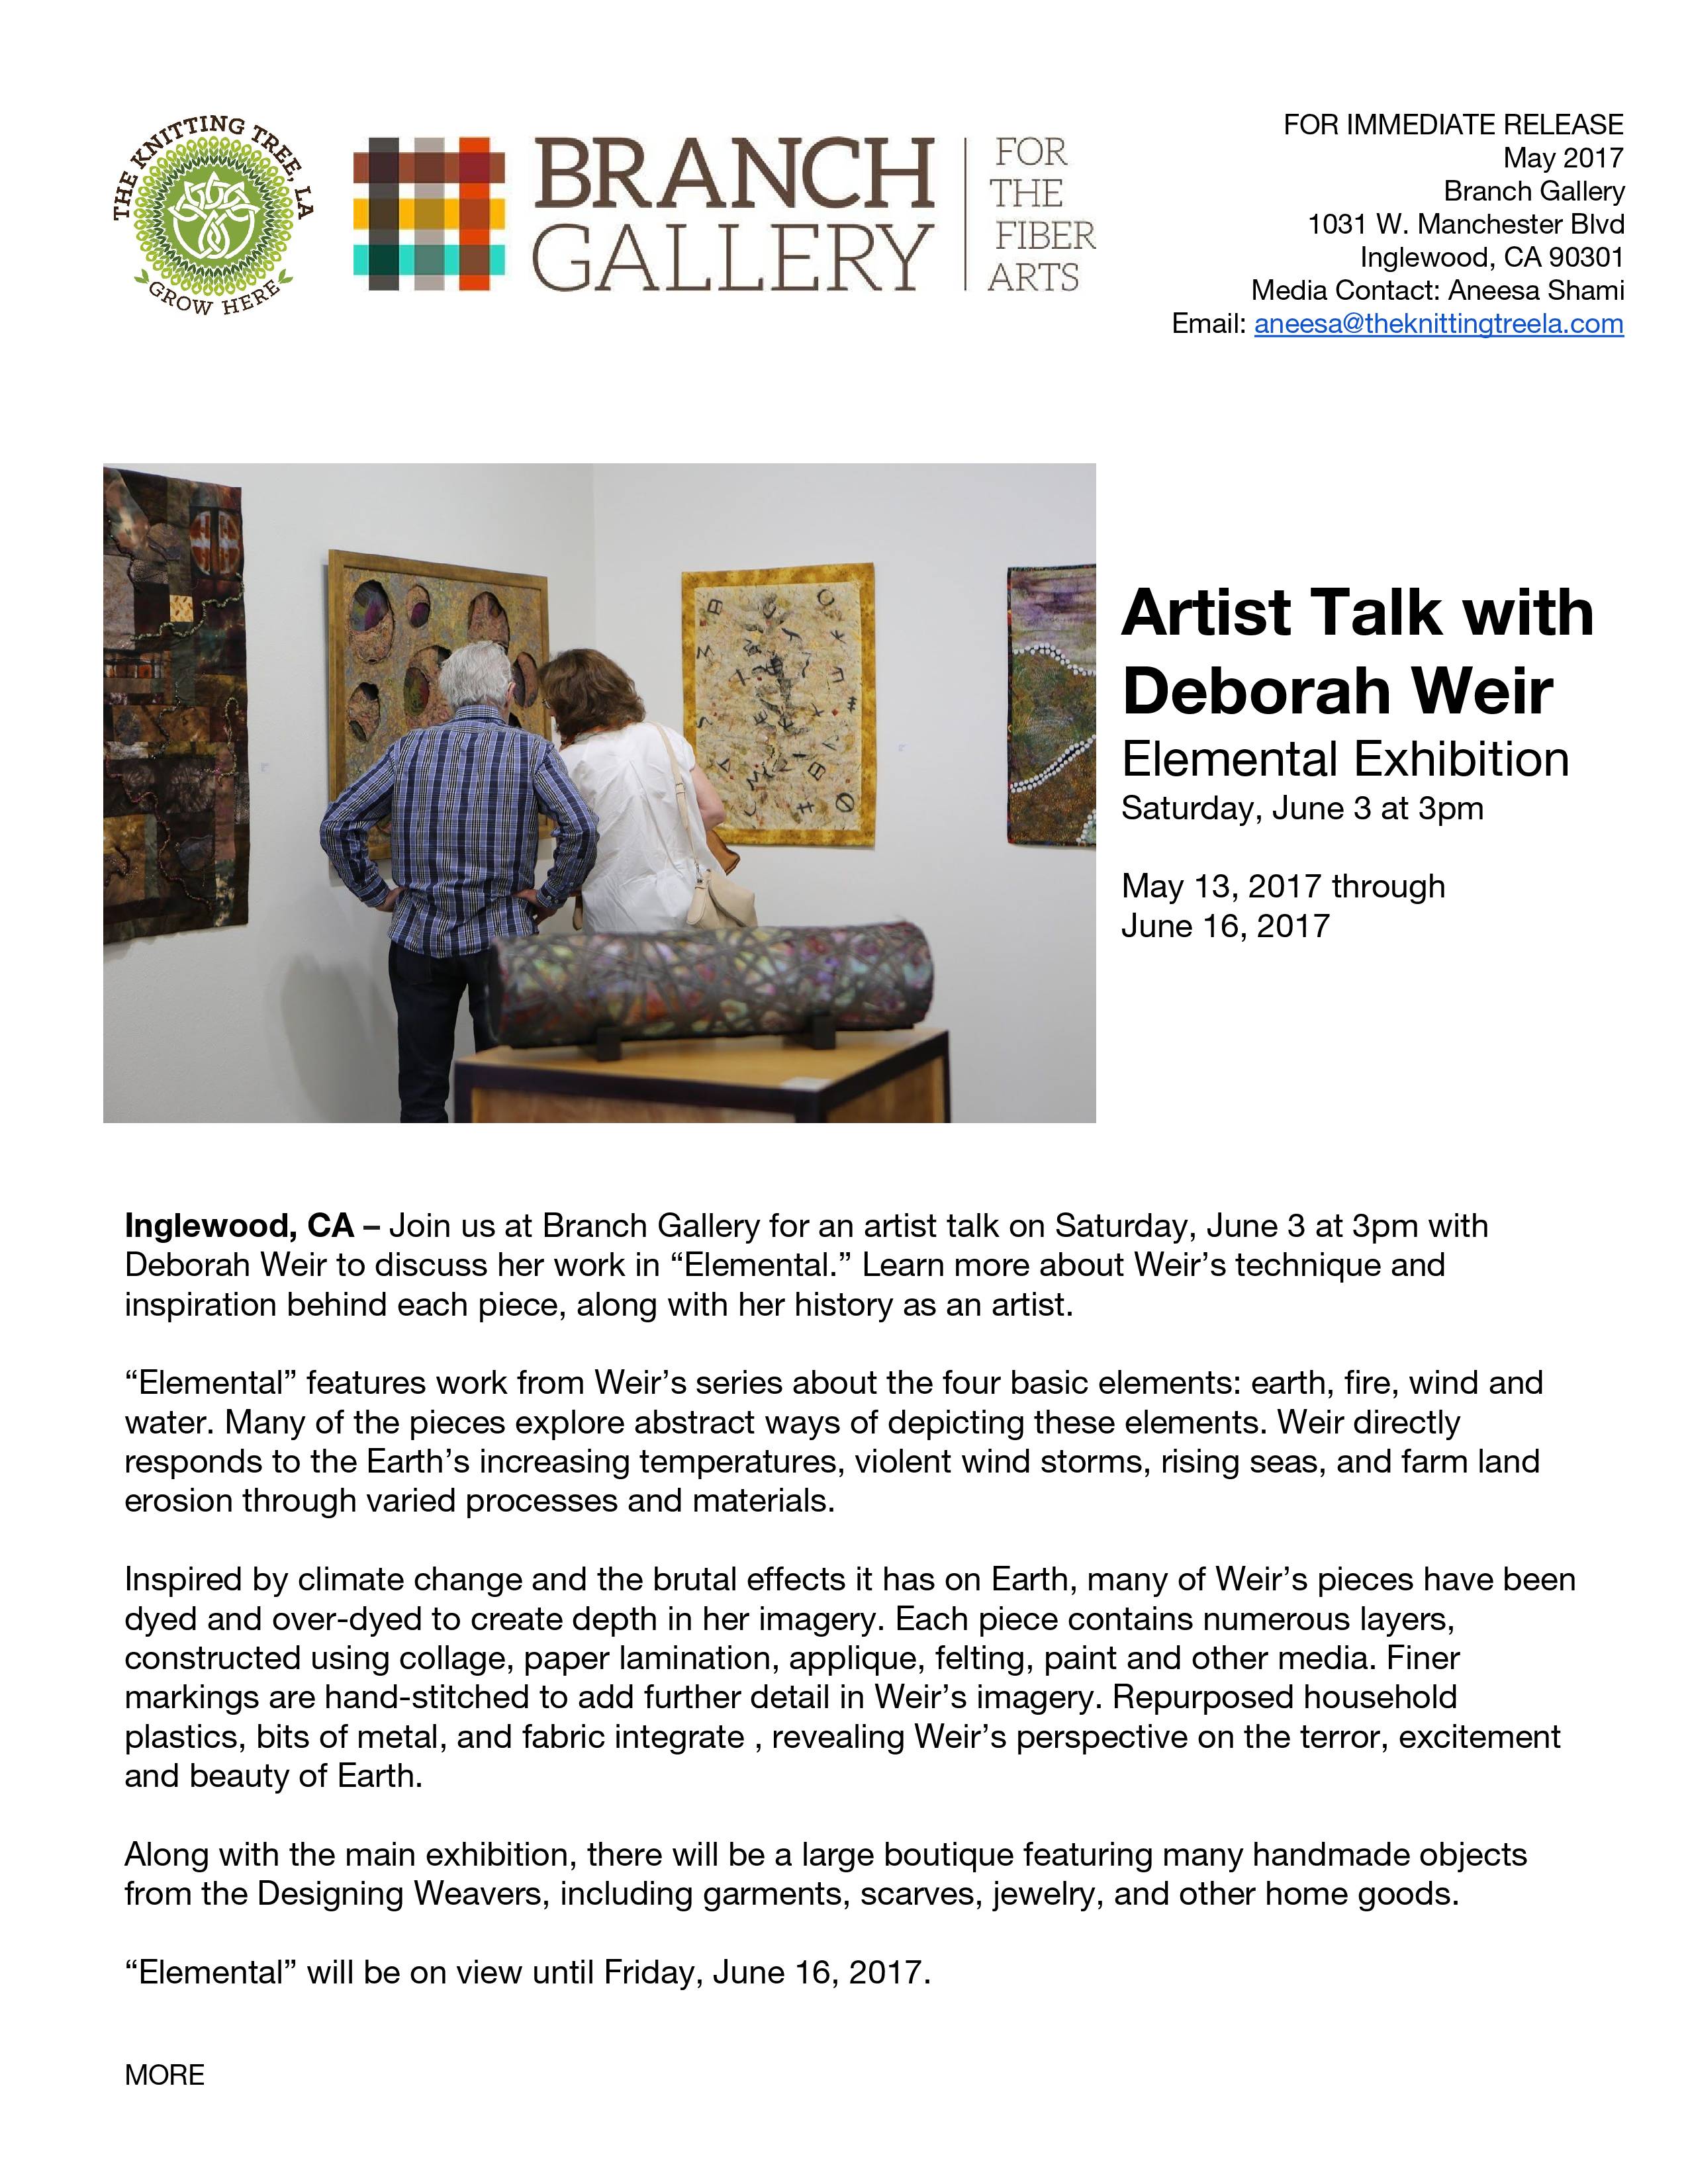
My piece Midden #1 is in print in FAN's current edition. And it will be traveling to the Texas Quilt Museum in the summer of 2024. Yes, it's a quilt, but VERY 3 dimensional!

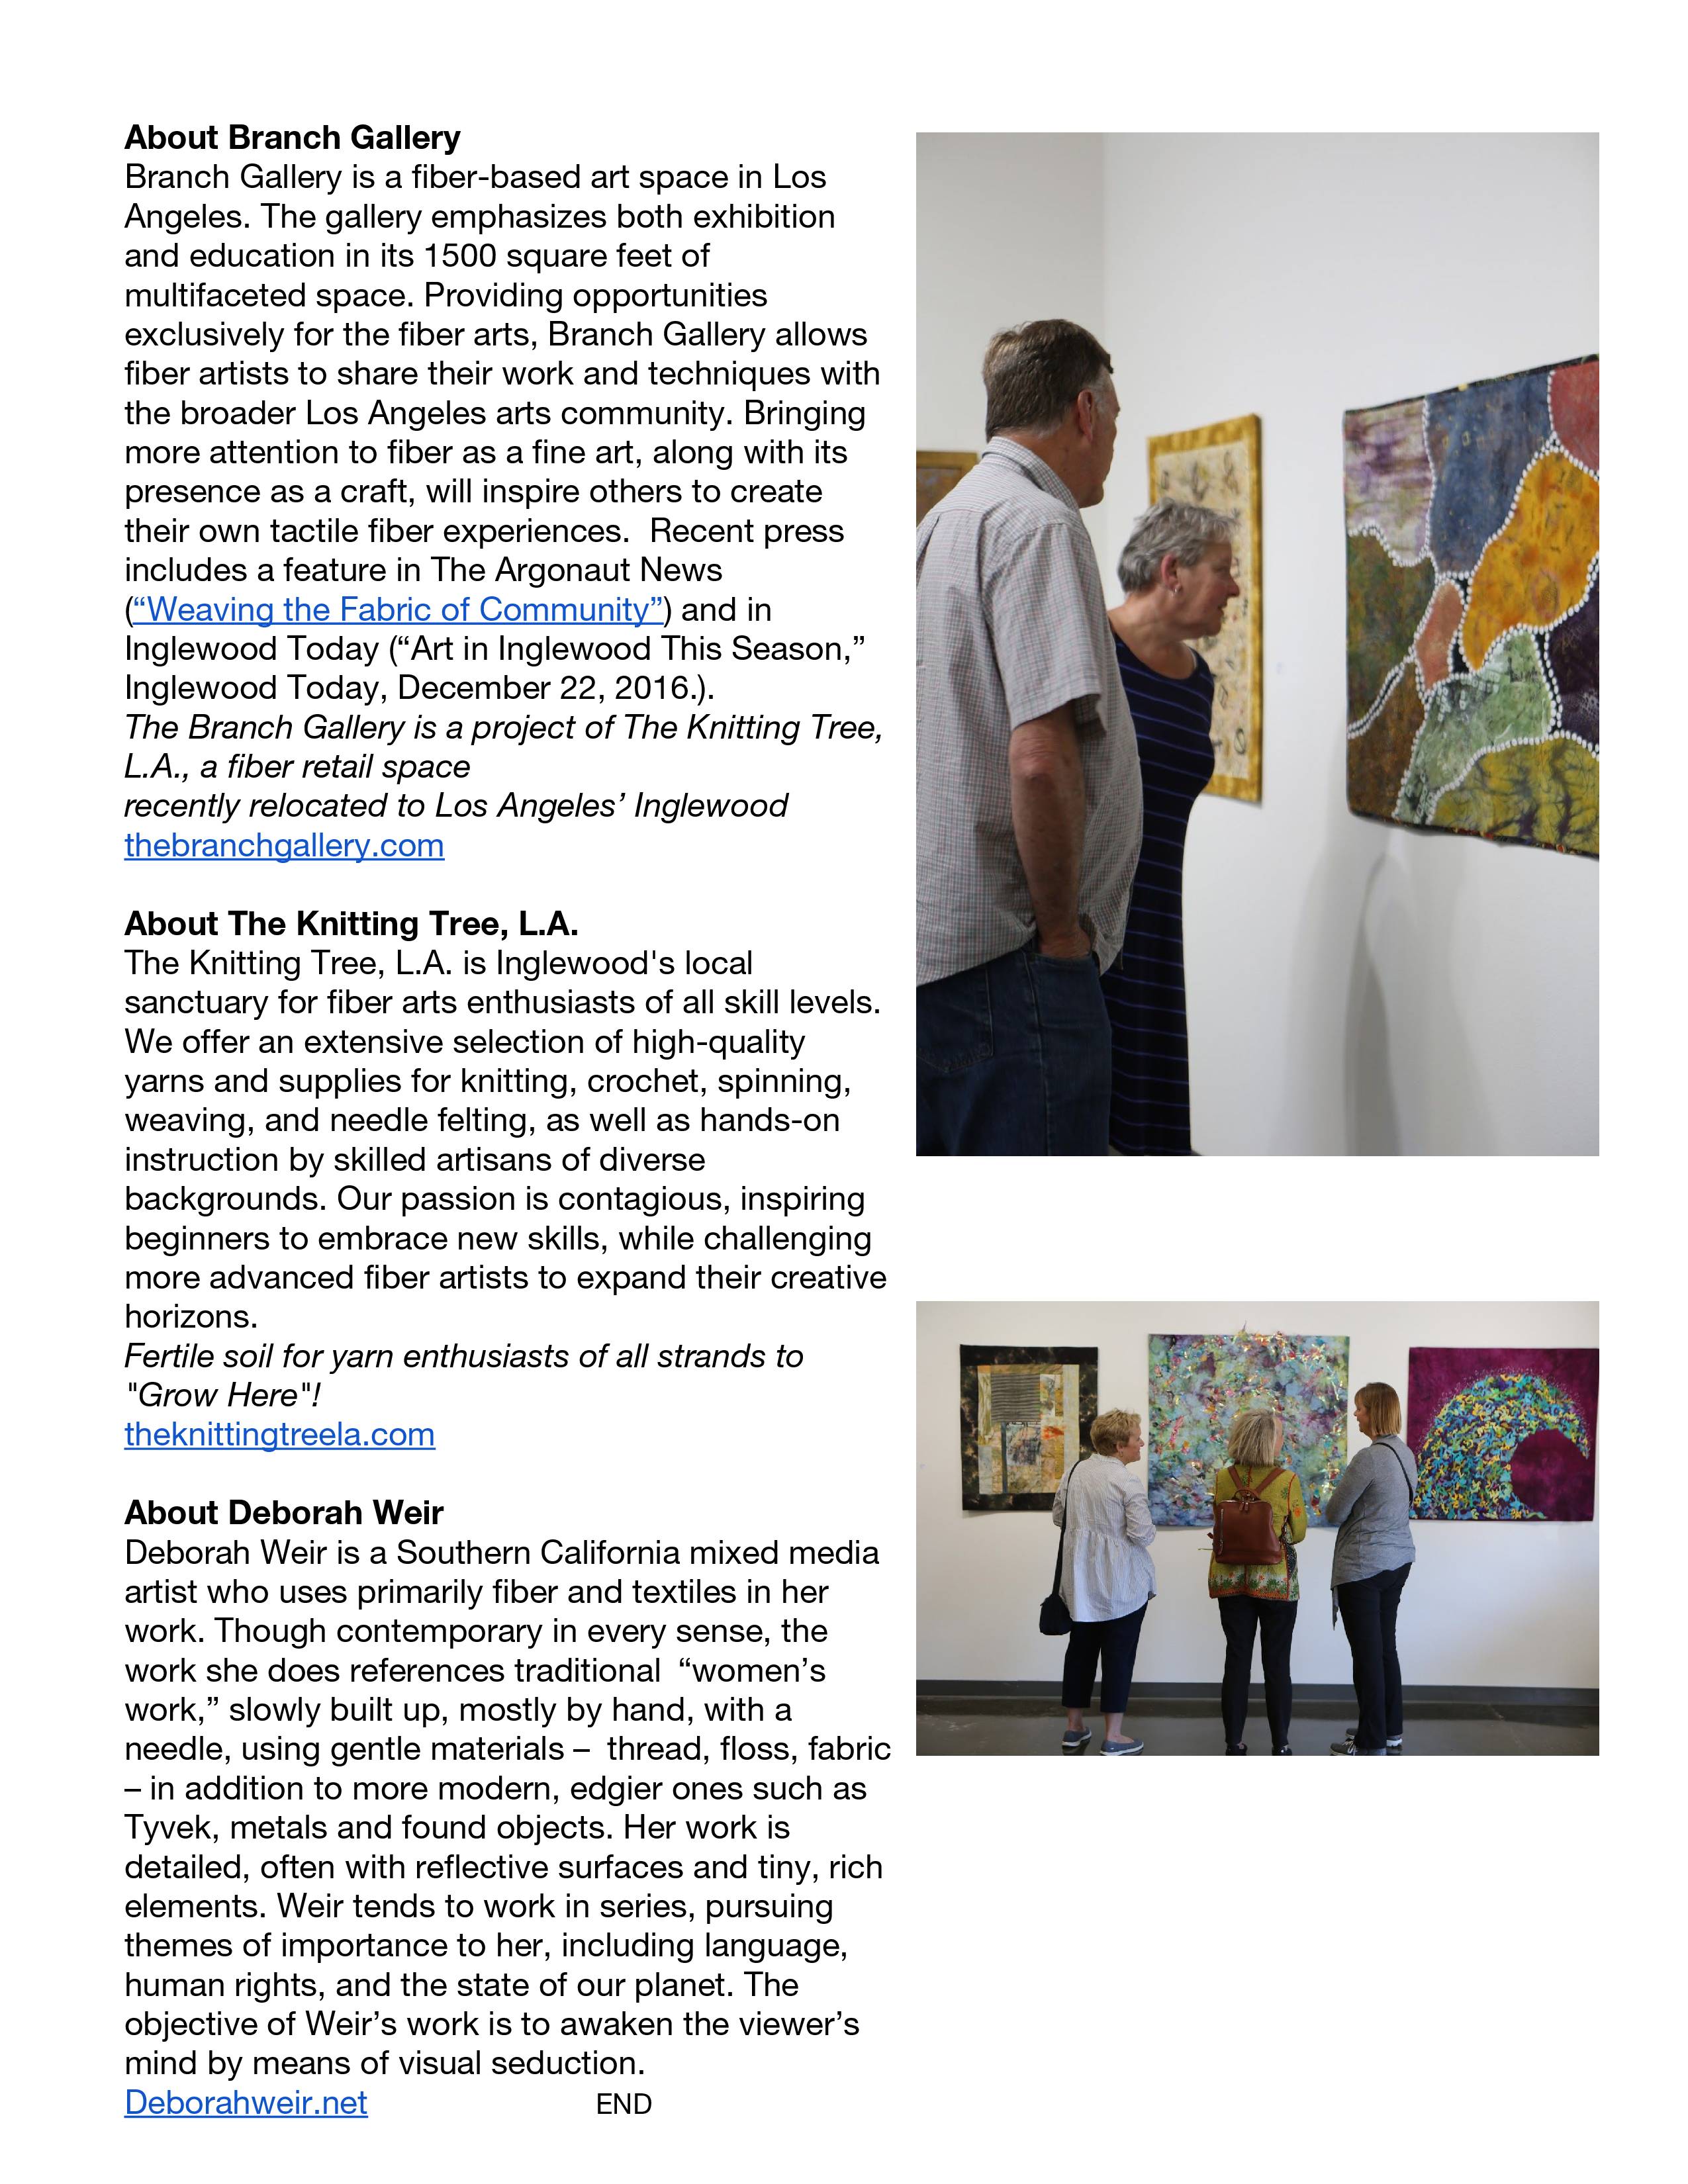
It's exciting how Philly loves the Phillies and Eagles, but there's a quiet passion for textiles here too. Haven't made it to the Kanta cloth collection at the PMA yet( through Jan), but I did catch Emily Richardson's amazing show at Gross Mcleaf and Bruce Hoffman's curation of Fiber Art Now's FIBER REIMAGINED at both Gravers Lane Galleries. Both shows run through October. The PMA annual Contemporary Craft show always features interesting Fibers and will run from Nov 3-5. Consider spending some of your fall in Philadelphia!
 |
| Emily Richardson Gross McCleaf Gallery |
 |
| Joy Stockdale Gravers Lane Gallery |
 |
| Alicja Kozlowska Gravers Lane Gallery |
I’ve struggled at releasing myself from the structure that I learned in my prior research career. For example, I have created my own dye color recipes -- 24 bottles of my own dye formulas, carefully documented into ratios of red, blue, yellow, or black that went into each recipe.


It was sort of a mystery to me. I now know my body was telling me this scientific approach was not serving me, that I needed to rely on my intuitive sense of color. I was attempting to document exactness into every project, exactly how I created every color for a particular project—so many drops of yellow mixed with so many drops of blue and then maybe some drops of red added in. Yeah, I’m gagging just writing this.

I put the piece back on a frame to add dye (the frame is
shown below as illustration). I learned a dry dye application method from Karen
Sistek a Master Silk Painter. The dry method is possible by first applying a
starch resist (Magic Sizing) in a spray over the entire piece of silk. After the
starch dries, the dye does not penetrate the silk as quickly. Still, a brush of
dye needs to be almost dry and the dye is applied in small brush strokes.


I loved the effect, not using the dry brush method, but applying wet dye over the starched surface. Dyes did not flow, but resulted in a distressed surface, one that almost looked dirty. Dirty was perfect! I was simulating rocks after all!
I mixed colors on the
fly! No X number of drops of one color or the other! I used the same brush, not
this for olive, this one for purple. It was liberating. The results were
dramatic and interesting! I was mixing methods and mixing dyes with
recklessness and loving the results!
After steaming, this piece is now ready for the final step--more
later.
_________________________________________________________
Silk painting frames I use—PVC pipe, masking tape and pins
to stretch the silk to the frame.


Hi all, We have been in Paris and on the Cote d"Azure for 2 weeks celebrating with an assortment of people my husband's youngest daughter turning 50. One of the things I most wanted to do in Paris was go to the Louvre where I have never been. We got our tickets early and for, what seemed like, a good time. Not. Maybe there are no good times. It was crowded, let me say again, it was crowded. I had a plan that I would not have a plan to see anything specific but to just go with getting a sense of the overall place and kind of coasting around. Not. I ended up in the Greek and Roman statues multiple times no matter where I was headed. I finally saw ( in spite of my best efforts NOT to ) the Mona Lisa. What I actually saw was a very large space filled with people trying to take photos of the Mona Lisa, so I took photos of them photographing the Mona Lisa. I know I can see her on line a lot better then there.
Having made fun of this I did take a lot of photos of the sculptures because I like the faces as they were captured so long ago. One in particular is haunting me. A sculpture of a face under a veil. How do you do that in stone? How do you do that in any medium? So now I think I am going to try that in thread painting - after I think about it for awhile longer.


I recently had the opportunity to show a piece of work at a night-time illuminated art event-- Luminata at Green Lake in Seattle sponsored by the Fremont Arts Council. My pieces do well in natural light. Glacier Cathedral shown below with natural light coming from behind seemed like the best choice for the event.

I have seen signs made of acrylic effectively illuminated
from below with LED lights. I wanted to try that with this piece.
The vertical pieces of Glacier Cathedral fit into slots cut into a 1” base of acrylic glass. The acrylic base rests on an additional base of steel that is bolted onto the acrylic. With longer bolts and several washers, the acrylic and steel bases could be separated by enough space to accommodate the LED light strips.


I found out days before the event that electricity would not
be made available to the art pieces. So plan B was install a battery pack with
a remote control, both of which I had previously tested. Suddenly the LED lights
went out and the wire was extremely hot. I consulted with friends and my brother
whose ideas were helpful, but did not result in lighted lights. It was then that
I decided I was over my head in my expertise, so
abandoned the idea of LED lights.
Instead I back lit the piece with several battery powered spotlights. A super easy solution. Here the piece at home and at the event.


The failure turned out to be a grand success, but one I could have accomplished in hours rather than days. Perhaps I need to temper my desire to learn new things and rely on others with expertise to handle some parts of the fabrication.
On Christmas day 2022 a pipe froze flooding our newly remodeled condominium, leaving us homeless. I was devastated. Yet one week later on New Year’s Day as I walked along Church Street in historic Beaufort, South Carolina I came upon an old brick wall. It was alive with moss, lichen and tiny ferns, one brick so different from the next. I decided to make a fabric brick wall. I discovered some wooden jewelry/treasure boxes on line that were the size of bricks. I then covered the boxes in batting and hand dyed and painted fabrics. Embellishing each brick was fun using nylon netting, Tyvek, wool roving, cheesecloth with lots of stitching with embroidery floss. I then played with arranging the bricks to form the wall.


 |
| Field Notes 1-20 |
In the fall of last year, I drove to a small art gallery about an hour's drive away from my home to see an exhibition. The work shown was by a Nova Scotian painter and printmaker, Bob Hainstock. I admire his abstracted landscapes and his use of colour. While I was looking at the exhibited pieces, I got talking with the gallery owner. We had a very nice chat about the artist's work, what I admired about it and how I thought it related to my own work. She asked a lot of questions about my own work, not having heard of me before.
My visit took an unexpected turn right there! She asked me if I was interested in showing in her gallery in the next year, and basically offered me a solo show on the spot. I was very surprised and agreed, of course. The space is great, it would be wonderful to have the whole gallery to myself and fill it with my art. I drove home with my head spinning, and wondering if it all would work out. The gallerist really hadn't seen my art at all, so I just hoped she wouldn't renege on her offer.
Fast forward one year, and my exhibition opened on August 28th, 2023. I'm very happy to have this opportunity to see this body of work in one room, and for other people to get to know my work as I hadn't shown in this area of my province so far.
.jpg)
.jpg)
.jpg)
The body of work I'm showing has been made during the last four years and mainly consists of stitched collages made with my monoprinted fabrics. These prints are made with natural material that I collect and is a snapshot of my immediate surroundings. The title of the exhibition is "Field Notes", referring to the character of a botanical expedition and exploration of the nature around me.
I will also teach a class about mono printing with natural materials at the gallery, to tie in with the exhibition.
It is important to have some engaging words at the ready to talk about your art, to describe it to people even without the help of visuals so they can get interested in what you do. You never know where this will lead!
 |
| Field Notes: Hidden Away |
Regina Marzlin "Field Notes", August 28th - September 23rd 2023, Visual Voice Fine Art, Truro, Nova Scotia
To see all pieces in the exhibition, go to
Visual Voice Fine Art | Unique Works by Talented Artists (visual-voice.ca)
I was asked as an artist in Quilt National 2023 to create a 5-7 minute long video about myself as an artist and the creation of the art work. The QN staff were great about giving direction as to how to set it up and what information to include. I was not thrilled at the prospect but decided it would be a good thing to do. In the end it was not hard to do and I encourage everyone to try to make one about your work and share it with the ACN group!
Here was what I did and how I went about it.
I decided on a background that would not be distracting and that had good light. This turned out ot be in my dining area with my Chinese chest behind me and good light coming in the patio door. I moved the dining table back so I could stand in front of the chest.
I set up my I-phone (AKA camera) on a stack of books until it was the right height to record me talking and showing things. This meant moving the table back some more and adding lots more books to the stack. :-) I got various props (Fosshape samples, original inspiration wood fragment, etc, organized in front of me on the table so they were at hand. I chose something plain to wear.
I reviewed the questions they wanted answered and wrote my self a short list to have nearby to refer to if needed.
I chose a time of day when there was no lawn mowing or outside noise coming in. I made sure the nearby refrigerator (ice-maker) was off so it wouldn't suddenly start making loud noises. I made sure my husband was out of the house so I wouldn't be nervous :-)
I was ready! I got the camera turned the right way, checked that I was recording loud enough, checked that I was speaking to the camera. I looked at that, got over the freakiness of watching myself, took a deep breath and went for it.
I went straight through. I watched it and tried to be not too hard on myself. It was within the timeframe, I covered most things, I didn't stumble too much and I decided I was done! Quilt National gave me a Dropbox site to send it too and that was easy.
So a lesson learned and now I have that in reserve if I need it for anything in the future.
Here were some of the questions I had as prompts.
Quilt National Suggested Talking points:
Share anything you think is important, unique, or compelling about your artwork!
Introduce yourself. What's your name? Where are you from?
What compelled you to make this artwork? What led up to its creation?
Was this quilt part of a series?
What is your background in art? What is your background in quilting?
Where do you find inspiration?
What references did you use in creating this artwork?
What techniques did you use?
Did you problem-solve along the way? How so?
What makes this artwork unique?
And this is a link to the Quilt National video. Russ Little and many other artists you might want to learn more about are there as well.
https://www.youtube.com/watch?v=wDqheAjsgg0
 Mona Lisa