Monday, August 21, 2023

Creating a Video About Your Artwork by Barbara Schneider

 I was asked as an artist in Quilt National 2023 to create a 5-7 minute long video about myself as an artist and the creation of the art work. The QN staff were great about giving direction as to how to set it up and what information to include. I was not thrilled at the prospect but decided it would be a good thing to do. In the end it was not hard to do and I encourage everyone to try to make one about your work and share it with the ACN  group!

Here was what I did and how I went about it.

I decided on a background that would not be distracting and that had good light. This turned out ot be in my dining area with my Chinese chest behind me and good light coming in the patio door. I moved the dining table back so I could stand in front of the chest.

I set up my I-phone (AKA camera)  on a stack of books until it was the right height to record me talking and showing things.  This meant moving the table back some more and adding lots more books to the stack. :-) I got various props (Fosshape samples, original inspiration wood fragment, etc, organized in front of me on the table so they were at hand. I chose something plain to wear.

I reviewed the questions they wanted answered and wrote my self a short list to have nearby to refer to if needed.

I chose a time of day when there was no lawn mowing or outside noise coming in. I made sure the nearby refrigerator (ice-maker) was off so it wouldn't suddenly start making loud noises. I made sure my husband was out of the house so I wouldn't be nervous :-)

I was ready!  I got the camera turned the right way, checked that I was recording loud enough, checked that I was speaking to the camera. I looked at that, got over the freakiness of watching myself, took a deep breath and went for it.

I went straight through. I watched it and tried to be not too hard on myself.  It was within the timeframe, I covered most things, I didn't stumble too much and I decided I was done! Quilt National gave me a Dropbox site to send it too and that was easy.  

So a lesson learned and now I have that  in reserve if I need it for anything in the future. 

Here were some of the questions I had as prompts.

 Quilt National Suggested Talking points:

Share anything you think is important, unique, or compelling about your artwork! 


Introduce yourself. What's your name? Where are you from? 

What compelled you to make this artwork? What led up to its creation? 

Was this quilt part of a series?

What is your background in art? What is your background in quilting?

Where do you find inspiration?

What references did you use in creating this artwork?

What techniques did you use?

Did you problem-solve along the way? How so?

What makes this artwork unique?

And this is a link to the Quilt National video.  Russ Little and many other artists you might want to learn more about are there as well.

 https://www.youtube.com/watch?v=wDqheAjsgg0


Saturday, August 19, 2023

Curating an Exhibit at The Eddie Rhodes Gallery by Connie Tiegel

 In order to hang a show at a gallery a lot of information needs to be gathered. Visiting the gallery helped me to measure the linear feet of the walls, get a feel for the layout of the space available to hang work including walls, ceiling, floors, vitrines, lighting, etc. I made a map of the space using compass points to orient me. This helped me tremendously when placing pieces to show most effectively.

The next set of facts needed was the size of individual pieces to be hung in the show. I got this information from the artists and the catalog that had been put together by Mary Ellen Latino.

 I identified the walls as compass points, divided up the linear feet of each wall to determine how many pieces could fit with how much space between each piece. I used kraft paper as my substrate for its sturdy quality and easy rollability.

 I calculated the size of each work at 1 inch =1 foot and drew/cutout a piece of kraft paper for each piece. I laid out the colors of the pieces on each corresponding shape and began to play with a layout for the gallery. I continually worked with size, color and how well the pieces talked with each other until I was pleased with the layout. I kept in mind that I wanted about 3 feet between pieces so there was room for labels on the wall. Consistency was important for this.


Saturday, August 12, 2023

This Year's Flags by Connie Tiegel

  Every year I make 3 artcloth flags to fly in my back yard. I began more than 20 years ago after a trip to Bhutan where there were large flagpoles everywhere with long vertical flags flying to catch the wind and disperse prayers to the universe. I was captivated by the idea and when home again decided to carry that idea into my backyard and life. When making the flags I reflect on world situations or events close to home. 

This year I am thankful for all the rain we received during the winter, even though the storms did damage to much property and lives. The winds destroyed two of my flag poles and shredded two of the three flags. I intentionally leave them up in the winter to watch the effects on silk. Usually the silk lasts well through the winter and when I replace the old flag with the new, I wash the old flags, cut them into strips, braid the strips into l ropes then wind the ropes into very large balls. I have used the balls in photography books I make. 

This May I shibori dyed 3 separate 3 yard pieces of silk charmeuse with 3 color schemes: yellow/green, red/purple, and blue /violet.

On the first flag I stamped on a full surface design, (same stamp over the whole piece). This gave a cohesive background and suggested a bold foreground. I finished with applique of large flower petals. The second flag I used some branches from the garden and a gelli plate to make the background and added gold foil to sparkle in the breezes that blow every afternoon.  Butterflies and bees were stamped onto the surface of the third flag in gold paint. The flags not only send prayers of thanks to the universe this year for breaking the drought and giving us water but they bring us pleasure throughout the year as we watch them move in response to the wind and sun.


Saturday, August 5, 2023

Sharing time with other artists by Connie Tiegel

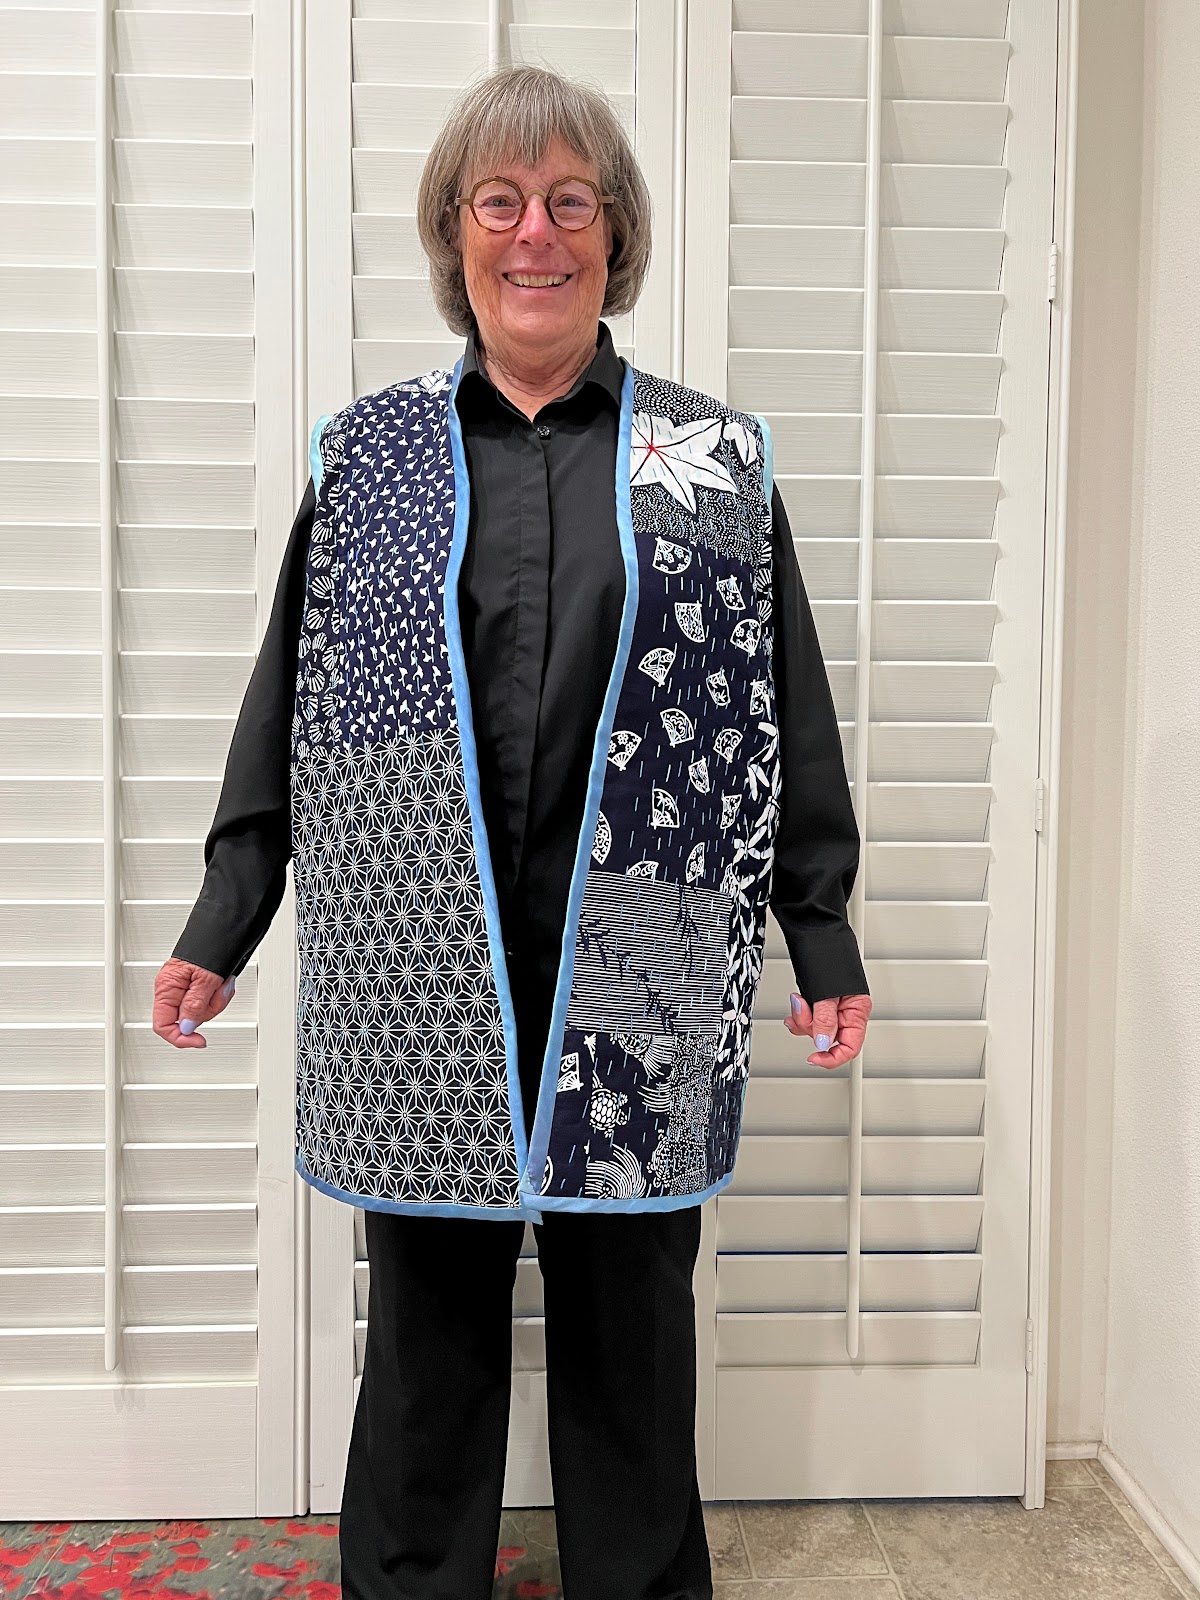
 Making a jacket with the jacket queens:

After 4 days of sharing retreat time a small group of retreat participants decided they wanted to do more together during the year. Two of the gals got together and proposed making a simple jacket that would fit all of our figures and look stunning on all of us. We were dubbed the “jacket queens” and eagerly watched for emails that would give us dates to meet and work on our projects. 
The first step was to secure some kantha cloth from which to cut our patterns. Most everyone looked on the internet and found their cloth. I decided to make my cloth from my own stash. I sewed together a bundle of indigo dyed fabrics I was gifted about 20 years ago. For the lining I chose some hand dyed blue silk charmeuse


 Bubble gauze was chosen as the batting so the drape of the fabrics would remain true. I stitched my 3 layers together for a couple of months and finally had a 48 inch by 60 inch piece of layered and stitched fabric ready to cut to pattern.  The “jacket queens” got together to cut out the pattern and plan the sewing, learning new stitching methods, and options for the finished look. I used a combination of machine stitching and hand stitching of French seams to complete my jacket. After 4 months we had a gathering to show off our work. Everyone had approached this same jacket with different ideas and each jacket was distinct to the maker and all beautiful. I happily wear my “jacket queen” jacket to as many occasions as I can.