
Hi all, We have been in Paris and on the Cote d"Azure for 2 weeks celebrating with an assortment of people my husband's youngest daughter turning 50. One of the things I most wanted to do in Paris was go to the Louvre where I have never been. We got our tickets early and for, what seemed like, a good time. Not. Maybe there are no good times. It was crowded, let me say again, it was crowded. I had a plan that I would not have a plan to see anything specific but to just go with getting a sense of the overall place and kind of coasting around. Not. I ended up in the Greek and Roman statues multiple times no matter where I was headed. I finally saw ( in spite of my best efforts NOT to ) the Mona Lisa. What I actually saw was a very large space filled with people trying to take photos of the Mona Lisa, so I took photos of them photographing the Mona Lisa. I know I can see her on line a lot better then there.
Having made fun of this I did take a lot of photos of the sculptures because I like the faces as they were captured so long ago. One in particular is haunting me. A sculpture of a face under a veil. How do you do that in stone? How do you do that in any medium? So now I think I am going to try that in thread painting - after I think about it for awhile longer.


I recently had the opportunity to show a piece of work at a night-time illuminated art event-- Luminata at Green Lake in Seattle sponsored by the Fremont Arts Council. My pieces do well in natural light. Glacier Cathedral shown below with natural light coming from behind seemed like the best choice for the event.

I have seen signs made of acrylic effectively illuminated
from below with LED lights. I wanted to try that with this piece.
The vertical pieces of Glacier Cathedral fit into slots cut into a 1” base of acrylic glass. The acrylic base rests on an additional base of steel that is bolted onto the acrylic. With longer bolts and several washers, the acrylic and steel bases could be separated by enough space to accommodate the LED light strips.


I found out days before the event that electricity would not
be made available to the art pieces. So plan B was install a battery pack with
a remote control, both of which I had previously tested. Suddenly the LED lights
went out and the wire was extremely hot. I consulted with friends and my brother
whose ideas were helpful, but did not result in lighted lights. It was then that
I decided I was over my head in my expertise, so
abandoned the idea of LED lights.
Instead I back lit the piece with several battery powered spotlights. A super easy solution. Here the piece at home and at the event.


The failure turned out to be a grand success, but one I could have accomplished in hours rather than days. Perhaps I need to temper my desire to learn new things and rely on others with expertise to handle some parts of the fabrication.
On Christmas day 2022 a pipe froze flooding our newly remodeled condominium, leaving us homeless. I was devastated. Yet one week later on New Year’s Day as I walked along Church Street in historic Beaufort, South Carolina I came upon an old brick wall. It was alive with moss, lichen and tiny ferns, one brick so different from the next. I decided to make a fabric brick wall. I discovered some wooden jewelry/treasure boxes on line that were the size of bricks. I then covered the boxes in batting and hand dyed and painted fabrics. Embellishing each brick was fun using nylon netting, Tyvek, wool roving, cheesecloth with lots of stitching with embroidery floss. I then played with arranging the bricks to form the wall.


 |
| Field Notes 1-20 |
In the fall of last year, I drove to a small art gallery about an hour's drive away from my home to see an exhibition. The work shown was by a Nova Scotian painter and printmaker, Bob Hainstock. I admire his abstracted landscapes and his use of colour. While I was looking at the exhibited pieces, I got talking with the gallery owner. We had a very nice chat about the artist's work, what I admired about it and how I thought it related to my own work. She asked a lot of questions about my own work, not having heard of me before.
My visit took an unexpected turn right there! She asked me if I was interested in showing in her gallery in the next year, and basically offered me a solo show on the spot. I was very surprised and agreed, of course. The space is great, it would be wonderful to have the whole gallery to myself and fill it with my art. I drove home with my head spinning, and wondering if it all would work out. The gallerist really hadn't seen my art at all, so I just hoped she wouldn't renege on her offer.
Fast forward one year, and my exhibition opened on August 28th, 2023. I'm very happy to have this opportunity to see this body of work in one room, and for other people to get to know my work as I hadn't shown in this area of my province so far.
.jpg)
.jpg)
.jpg)
The body of work I'm showing has been made during the last four years and mainly consists of stitched collages made with my monoprinted fabrics. These prints are made with natural material that I collect and is a snapshot of my immediate surroundings. The title of the exhibition is "Field Notes", referring to the character of a botanical expedition and exploration of the nature around me.
I will also teach a class about mono printing with natural materials at the gallery, to tie in with the exhibition.
It is important to have some engaging words at the ready to talk about your art, to describe it to people even without the help of visuals so they can get interested in what you do. You never know where this will lead!
 |
| Field Notes: Hidden Away |
Regina Marzlin "Field Notes", August 28th - September 23rd 2023, Visual Voice Fine Art, Truro, Nova Scotia
To see all pieces in the exhibition, go to
Visual Voice Fine Art | Unique Works by Talented Artists (visual-voice.ca)
I was asked as an artist in Quilt National 2023 to create a 5-7 minute long video about myself as an artist and the creation of the art work. The QN staff were great about giving direction as to how to set it up and what information to include. I was not thrilled at the prospect but decided it would be a good thing to do. In the end it was not hard to do and I encourage everyone to try to make one about your work and share it with the ACN group!
Here was what I did and how I went about it.
I decided on a background that would not be distracting and that had good light. This turned out ot be in my dining area with my Chinese chest behind me and good light coming in the patio door. I moved the dining table back so I could stand in front of the chest.
I set up my I-phone (AKA camera) on a stack of books until it was the right height to record me talking and showing things. This meant moving the table back some more and adding lots more books to the stack. :-) I got various props (Fosshape samples, original inspiration wood fragment, etc, organized in front of me on the table so they were at hand. I chose something plain to wear.
I reviewed the questions they wanted answered and wrote my self a short list to have nearby to refer to if needed.
I chose a time of day when there was no lawn mowing or outside noise coming in. I made sure the nearby refrigerator (ice-maker) was off so it wouldn't suddenly start making loud noises. I made sure my husband was out of the house so I wouldn't be nervous :-)
I was ready! I got the camera turned the right way, checked that I was recording loud enough, checked that I was speaking to the camera. I looked at that, got over the freakiness of watching myself, took a deep breath and went for it.
I went straight through. I watched it and tried to be not too hard on myself. It was within the timeframe, I covered most things, I didn't stumble too much and I decided I was done! Quilt National gave me a Dropbox site to send it too and that was easy.
So a lesson learned and now I have that in reserve if I need it for anything in the future.
Here were some of the questions I had as prompts.
Quilt National Suggested Talking points:
Share anything you think is important, unique, or compelling about your artwork!
Introduce yourself. What's your name? Where are you from?
What compelled you to make this artwork? What led up to its creation?
Was this quilt part of a series?
What is your background in art? What is your background in quilting?
Where do you find inspiration?
What references did you use in creating this artwork?
What techniques did you use?
Did you problem-solve along the way? How so?
What makes this artwork unique?
And this is a link to the Quilt National video. Russ Little and many other artists you might want to learn more about are there as well.
https://www.youtube.com/watch?v=wDqheAjsgg0
In order to hang a show at a gallery a lot of information needs to be gathered. Visiting the gallery helped me to measure the linear feet of the walls, get a feel for the layout of the space available to hang work including walls, ceiling, floors, vitrines, lighting, etc. I made a map of the space using compass points to orient me. This helped me tremendously when placing pieces to show most effectively.
The next set of facts needed was the size of individual pieces to be hung in the show. I got this information from the artists and the catalog that had been put together by Mary Ellen Latino.
I identified the walls as compass points, divided up the linear feet of each wall to determine how many pieces could fit with how much space between each piece. I used kraft paper as my substrate for its sturdy quality and easy rollability.
I calculated the size of each work at 1 inch =1 foot and drew/cutout a piece of kraft paper for each piece. I laid out the colors of the pieces on each corresponding shape and began to play with a layout for the gallery. I continually worked with size, color and how well the pieces talked with each other until I was pleased with the layout. I kept in mind that I wanted about 3 feet between pieces so there was room for labels on the wall. Consistency was important for this.


Every year I make 3 artcloth flags to fly in my back yard. I began more than 20 years ago after a trip to Bhutan where there were large flagpoles everywhere with long vertical flags flying to catch the wind and disperse prayers to the universe. I was captivated by the idea and when home again decided to carry that idea into my backyard and life. When making the flags I reflect on world situations or events close to home.
This year I am thankful for all the rain we received during the winter, even though the storms did damage to much property and lives. The winds destroyed two of my flag poles and shredded two of the three flags. I intentionally leave them up in the winter to watch the effects on silk. Usually the silk lasts well through the winter and when I replace the old flag with the new, I wash the old flags, cut them into strips, braid the strips into l ropes then wind the ropes into very large balls. I have used the balls in photography books I make.
This May I shibori dyed 3 separate 3 yard pieces of silk charmeuse with 3 color schemes: yellow/green, red/purple, and blue /violet.
On the first flag I stamped on a full surface design, (same stamp over the whole piece). This gave a cohesive background and suggested a bold foreground. I finished with applique of large flower petals. The second flag I used some branches from the garden and a gelli plate to make the background and added gold foil to sparkle in the breezes that blow every afternoon. Butterflies and bees were stamped onto the surface of the third flag in gold paint. The flags not only send prayers of thanks to the universe this year for breaking the drought and giving us water but they bring us pleasure throughout the year as we watch them move in response to the wind and sun.
Making a jacket with the jacket queens:
After 4 days of sharing retreat time a small group of retreat participants decided they wanted to do more together during the year. Two of the gals got together and proposed making a simple jacket that would fit all of our figures and look stunning on all of us. We were dubbed the “jacket queens” and eagerly watched for emails that would give us dates to meet and work on our projects.
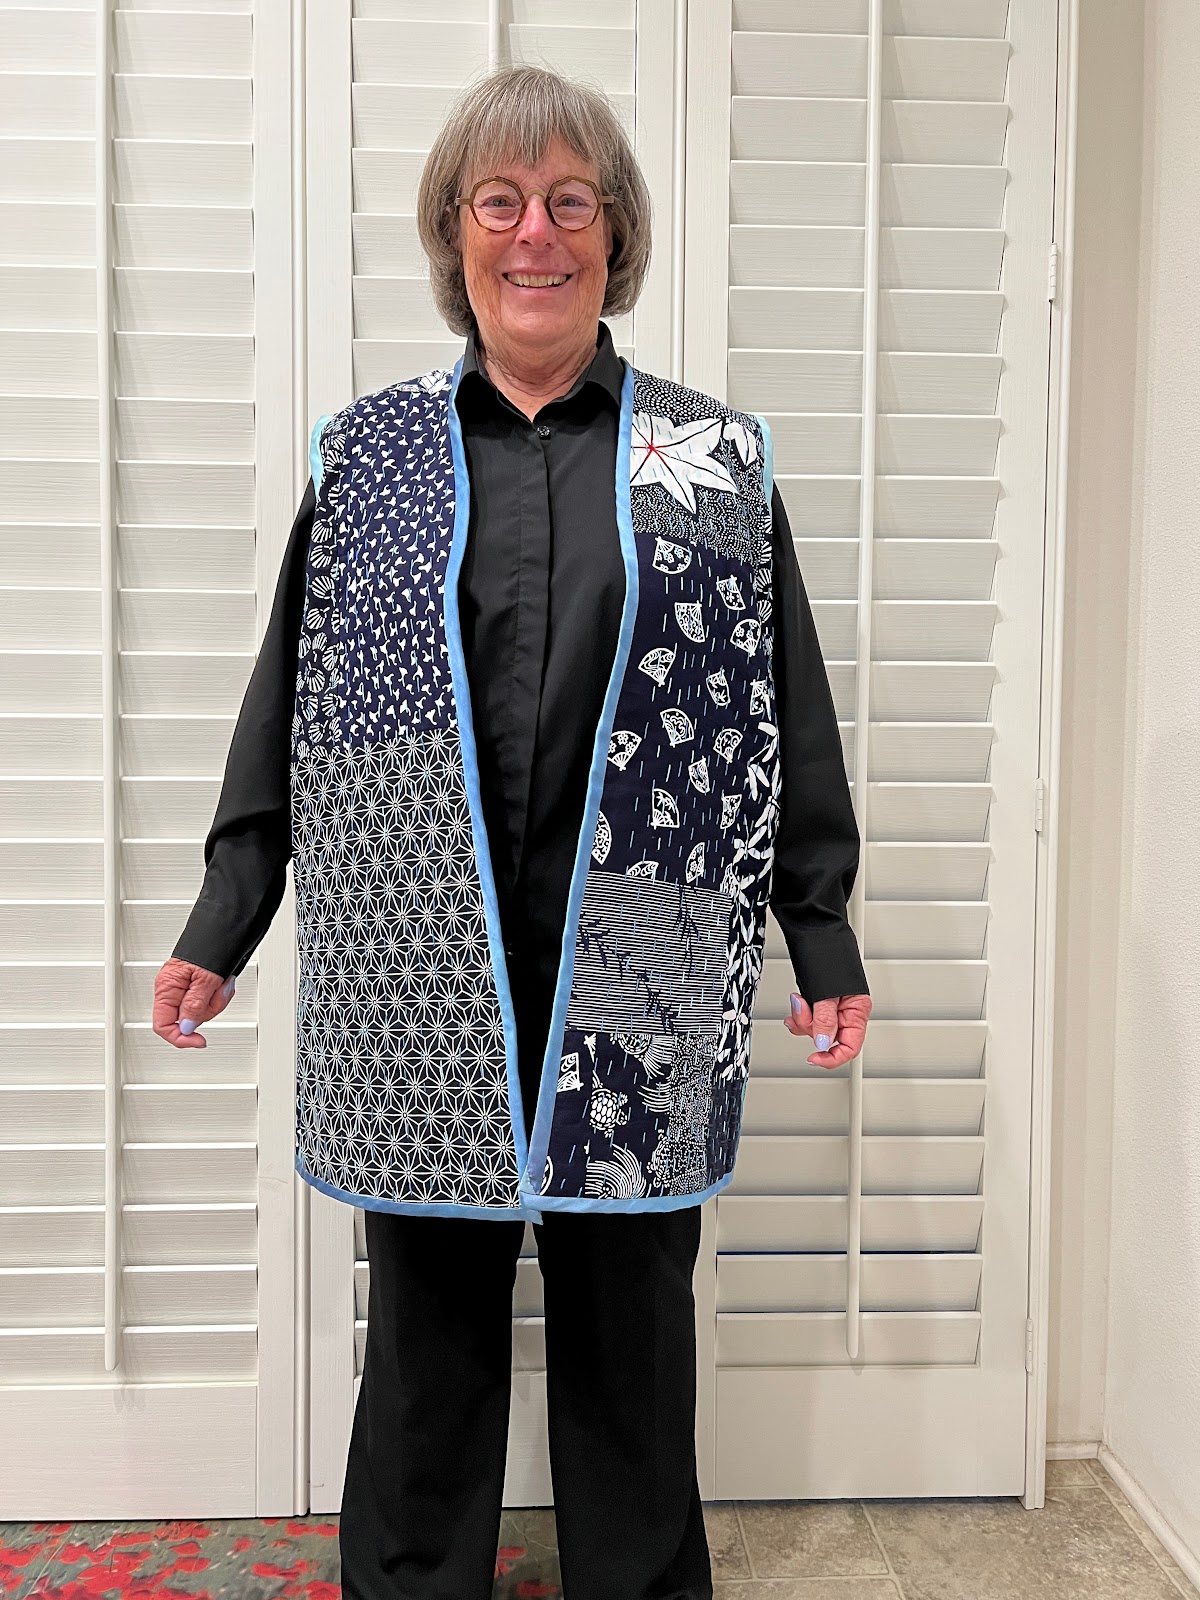
The first step was to secure some kantha cloth from which to cut our patterns. Most everyone looked on the internet and found their cloth. I decided to make my cloth from my own stash. I sewed together a bundle of indigo dyed fabrics I was gifted about 20 years ago. For the lining I chose some hand dyed blue silk charmeuse




 Mona Lisa