Last fall I scoured Chicago scrap yards for rusty or rust-able metal in the weeks preceding the start of my Rust, Tannins and Indigo class at Maiwa School of Textiles. Friends donated rusty objects and I even found a nearby source of scrap non-galvanized steel sheetings sold by the pound that helped me with my homework! Some family health issues sprang up so things have been delayed a bit. I've managed to complete all class work related to Rusts and Tannins. I will tackle the natural Indigo portion in March in which we'll be asked to overdye many of the peices from this portion of the class. The instruction was thorough and well presented and the Facebook sharing with classmates was informative and fun. The beautifully subtle colors and the steam punk style textures have been mesmerizing. Highly recommended!
Here are some terrific samples from the junkyard that were too big and heavy to take home.

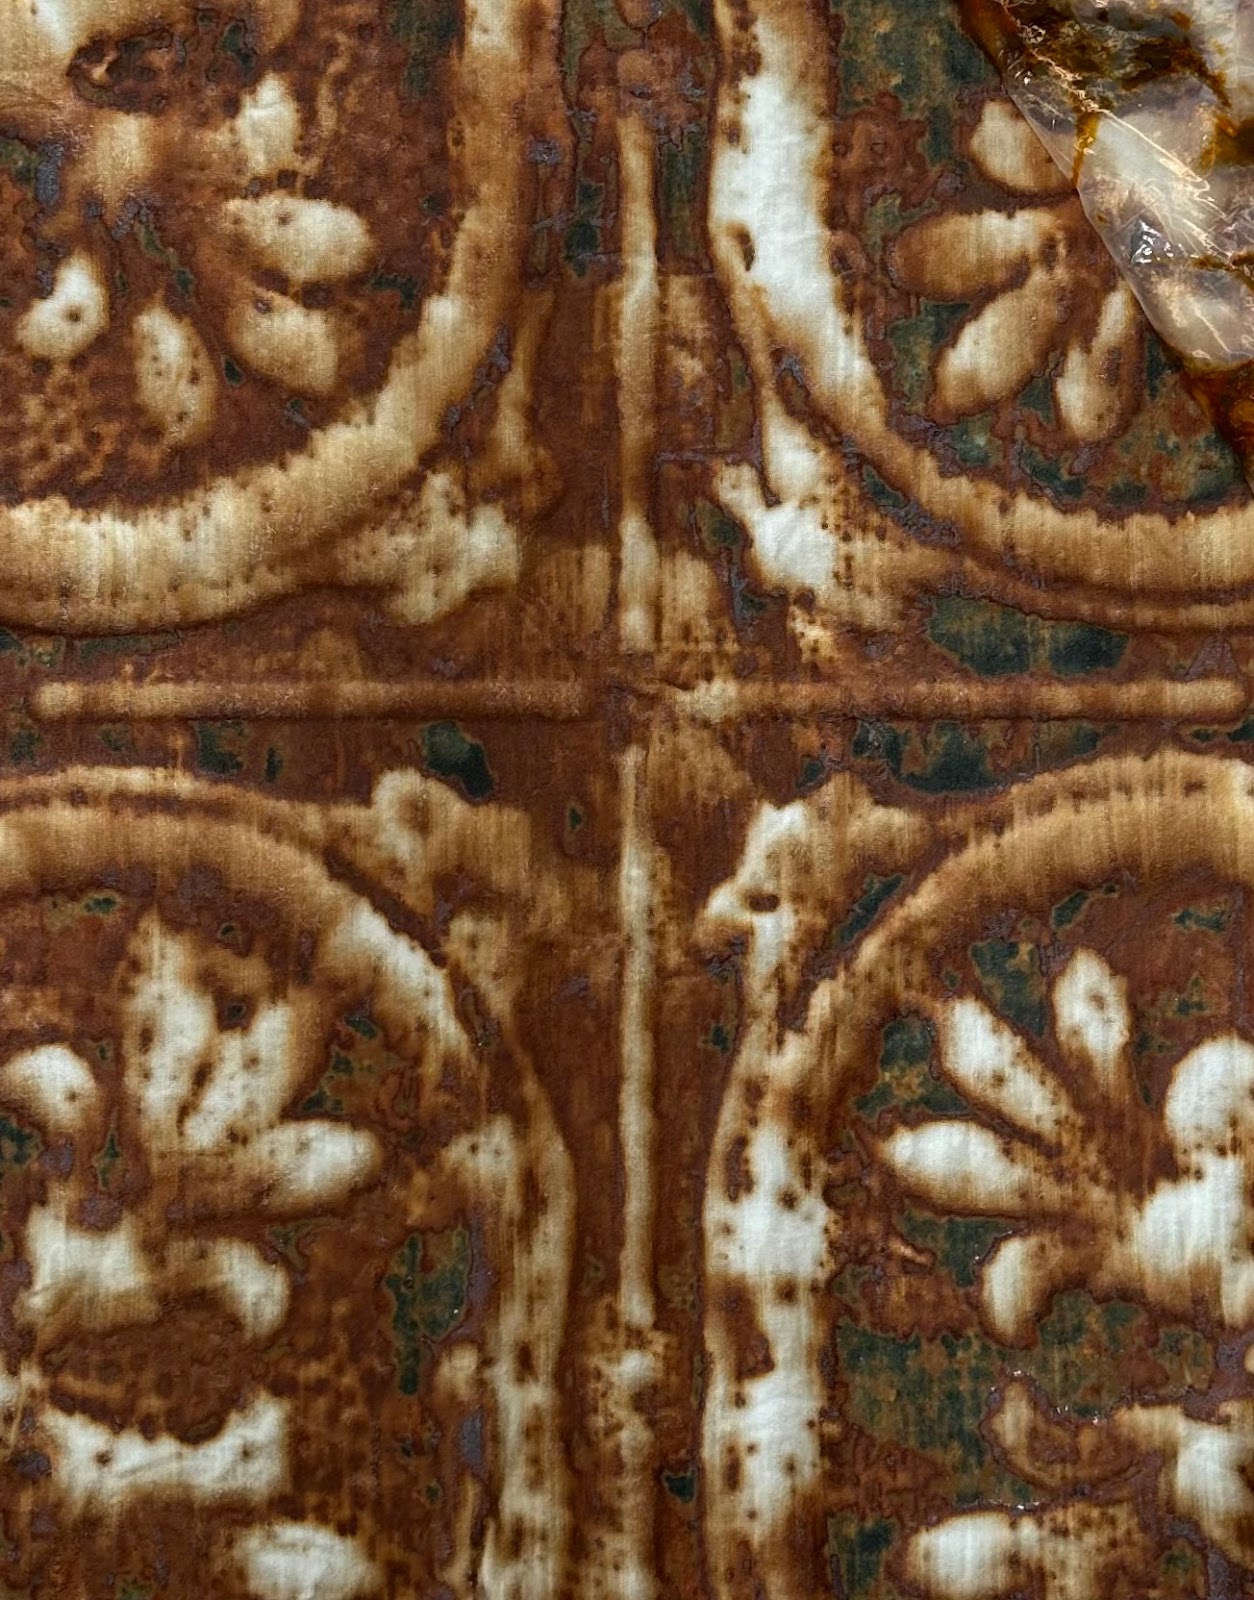
I did manage to buy one of the nicely rusted barrel lids. Later in the back yard of an antique store I found this rusted ceiling tile which I couldn't resist:
My cousin lent me some found objects to sample:

Gathered metal components washed and ready to use.
Projects included using non-rusted metals laid upon on treated cloth which yielded some great patterns and coloring. This was the first step on a large cotton shawl, which is very long and was folded over. It will be included in more processing.
Simply lying treated fabric on rusted surfaces produced terrific results as well, such as with the ceiling tiles...
...and perforated metals. Notice here that there are two distinct textures. The darker piece below is the side of the cloth that was facing the metal and holding moisture longer. The clear outlined image is the other side of the fabric that appears to have dried faster leaving less time for the rust to color it. Love that definition and resemblance to beehives!
Bundling objects came next, which involved rolling bits and bobs up in the cloth or wrapping cloth around larger rusty items. This first sample group is Pima cotton layered with scrap metal sprinkled in each layer and then all rolled up together. Really nice rust color and crazy fun texture!
Linen wrapped around a flat metal plate; resembling my very own Shroud of Turin.
Silk organza (1) and charmeuse (2 & 3) bundled with found objects from the junk yard, washers and metal components.

Next came the addition of Tannins in the dye bath. We used Black Tea, Pomegranate and Myrobalan, the last two products having been provided in the class kit from Maiwa. When Black tea combines with ferrous oxide in the rust it produces a very dark grey, almost black color as well as many intermediary tones and hues. The Myrobalan has a more pink cast to the grey and the Pomegranate produces a pale grey. The very dark spots on the pieces below are where rust on the peices turned black from exposure to the tanins in the tea bath.
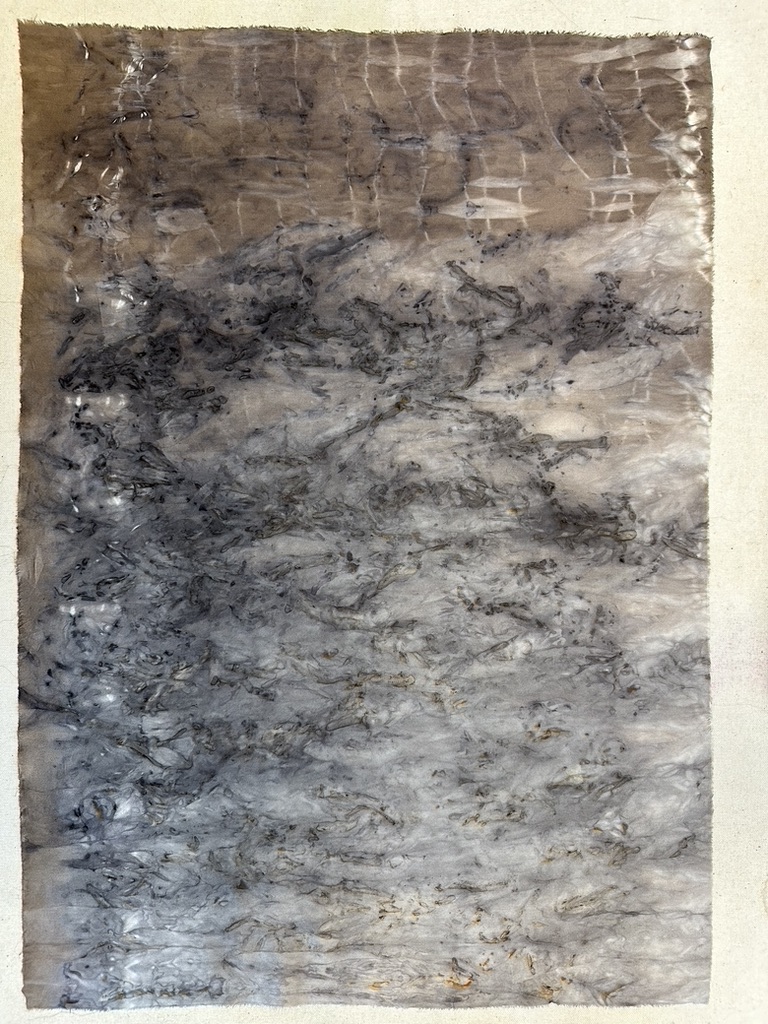
These two samples were scrunched in a ball and held together with rubber bands, then submerged in the dye bath. Look closely and you can see that this first piece is the other side of the more saturated ceiling tile piece shown above. This is the dryer side of the fabric and the outlines are more delicate and detailed. Great info going forward and something to make a note of in the dye journal that comes with class. Both of these were scrunched before being set in the tea bath.
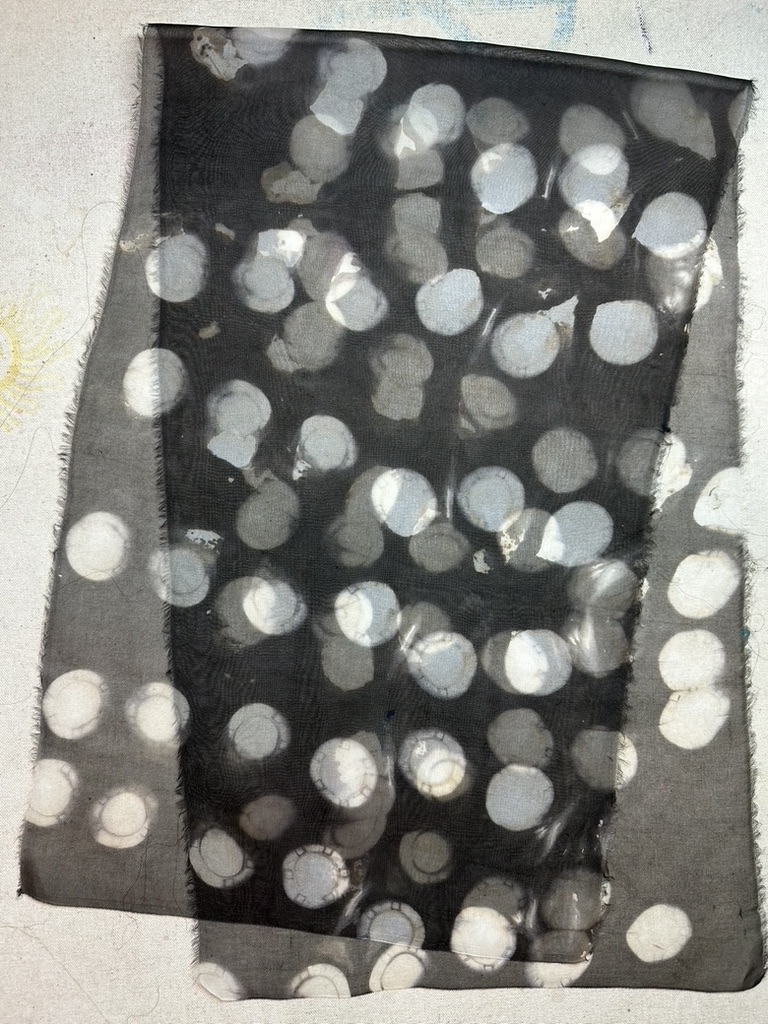
Metal components that had been a deep rusty color turned black in the Black Tea Bath. You can see the light circles from the rubber bands that were used as resists on this cotton bandana.
The Ferrous Oxide Tea baths using rusted washers and other scraps gave possibly the best combination of textures and colors:
Silk charmeause covered withrusty metals and then folded and clamped.
Silk charmeuse folded and wrapped.
Silk Habotai folded and clamped
Rayon Jacquard folded and clamped
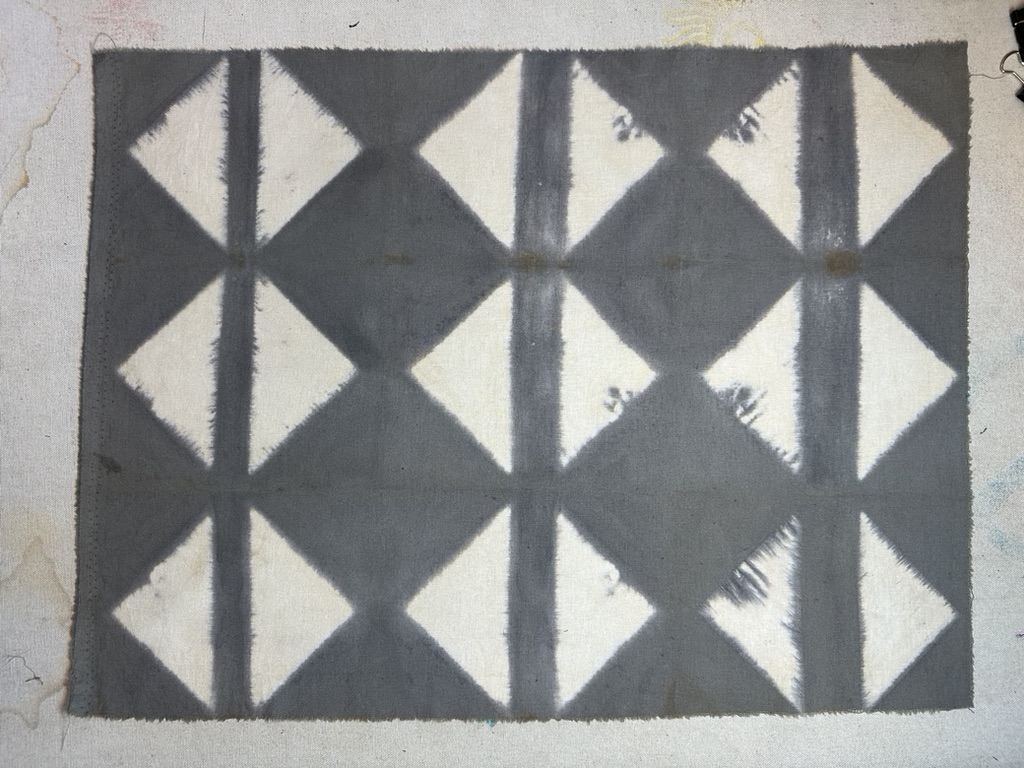
Pima Cotton folded and clamped with poker chips and acrylic circles.

Lastly for these modules we dyed clean fabric in several compounds for more striking results.
Rayon Jacquard folded and clamped
More Rayon Jacquard, folded clamped w/wooden squares
Cotton Linen weave (2 pcs) with resist clamping and set in different tannins.
Silk Habotai folded and clamped for resist
Silk Organza poker chip resist
It's wonderful working with ingredients that only occasionally require face masks and are not toxic to my skin. My hands have still looked gnarly by the end of the day but they eventually came clean. It felt good using Natural Dyes and it's also a healthier option. I'm grateful for learning about these classes from my fellow ACN members and so glad I've been able to dive in! Now it's on to the natural Indigo modules!


4 comments:
Who wrote this? Its a great blog would love to know who took the workshop!
Hi Barbara- It’s me Maggie! Guess I better add an edit to ID myself! Tags wouldn’t hurt either but it was late and that detail eluded me. So glad you enjoyed it!
Maria B: Well written and informative. A technical question: I thought the rust continues to work on the fabric. Is that correct? Can one stop the rusting process?
Lynda and I (Deborah Weir) took this course as well and I highly recommend it if you have the urge to rust. I wish I'd known in advance that one should NOT cut up all the fabrics they send you. Use scraps and oddments when possible until you get your skills up.
I was surprised that I actually liked the indigo dyeing. I'm not a big blue person but the results were off true blue and interesting. As Lynda said: It's all about the potato!! I also did some over dyeing of some of my samples just to have some variety.
Post a Comment